Use Print then Cut for complex designs, or to make stickers and labels. The design is printed out as one image, then cut out. This easy tutorial shows step-by-step instructions on how to use Print and Cut in Cricut Design Space.
Print then Cut is used for many of the messages on different supportive cards I’ve created.
The Semicolon Butterfly stickers also use this method; many more projects will use it too.
Materials needed to make Print and Cut stickers
- Images, usually in PNG format. You can find the butterfly semicolon images used in this tutorial in the Free Files Folder. They are design # 81 – Semicolon Butterfly PNG images.
- (If you don’t have the password for the free files, fill in the form at the bottom of the page and it will be emailed to you.)
- a printer (this is my printer and I love it)
- Zicoto Water-resistant Glossy Vinyl Sticker Paper (it’s the best!)
* Links to products are for your convenience in finding tools and materials, however, they are affiliate links.
As an Amazon Associate, I earn from qualifying purchases. *
Note: Calibrate your machine before doing Print Then Cut. To do this, click on the three lines in the top left corner of Design Space. Choose Caliburation. Then follow the directions on-screen exactly.
How to prepare the PNG files in Design Space
Download the ZIP and double-click to open the ZIP file.
Create a new project in Cricut Design Space.
Then click the Upload icon.

Click the Upload Image button.

Drop one JPG or PNG file here, or Browse to a file and upload it.

Select the Print Then Cut Image option and click the Upload button.

Choose Complex, then click Continue.

In the screenshot below, the gray and white checked background shows that the image doesn’t have a background; it’s like the PNG file has a clear background. The file will cut around the image as shown.
If you have a JPG image, you may want to remove the background using the tool shown at the left of the screen (which is currently only available to Cricut Access members.)
Click the Apply & Continue button.

Upload as many images as you like by repeating the above steps.
Highlight the images you want to use by clicking on them. (You can add multiple files at once.)
Click the Add to Canvas button.

The PNG files often import in a large size. The warning signs in the layers panel show that the images are too large to use Print Then Cut.

With the images still highlighted, type in a smaller number in the size field. Make sure the image proportion option is set to lock.

Most crafters don’t want to waste material; they want to maximize the area printed on.
Here’s how to make the most of your sticker paper sheet.
Create a rectangular shape that is the same size as the area available to Print Then Cut. Currently, it’s 6.75 x 9.25 inches on letter-size paper. Send the shape to the back.

Now, arrange and duplicate the images until you have used as much of the space as possible.
Then hide the gray sizing shape by clicking on the eye icon in the layers menu.

Highlight all of the images and click the Attach icon.

Click on the green Make it button, and you’ll see that all of your stickers will print out on one piece of paper.

What happens if you don’t attach all of the images?
Design Space will arrange the Print Then Cut images in the best way it can. Basically, it puts irregular or round shapes into squares, so it doesn’t take advantage of any white space.
This is how Cricut Design Space would arrange the butterfly images for me.

Step away from the computer and load your paper into your printer. I prefer to load and print one sheet at a time. If I stack the sticker paper on top of the regular printer page, sometimes a second paper sticks to the one I’m printing on; the image prints half on one sheet and half on the other, which ruins both sheets.

Click the Continue button on the preview screen.
Then, click on the Send to Printer button.

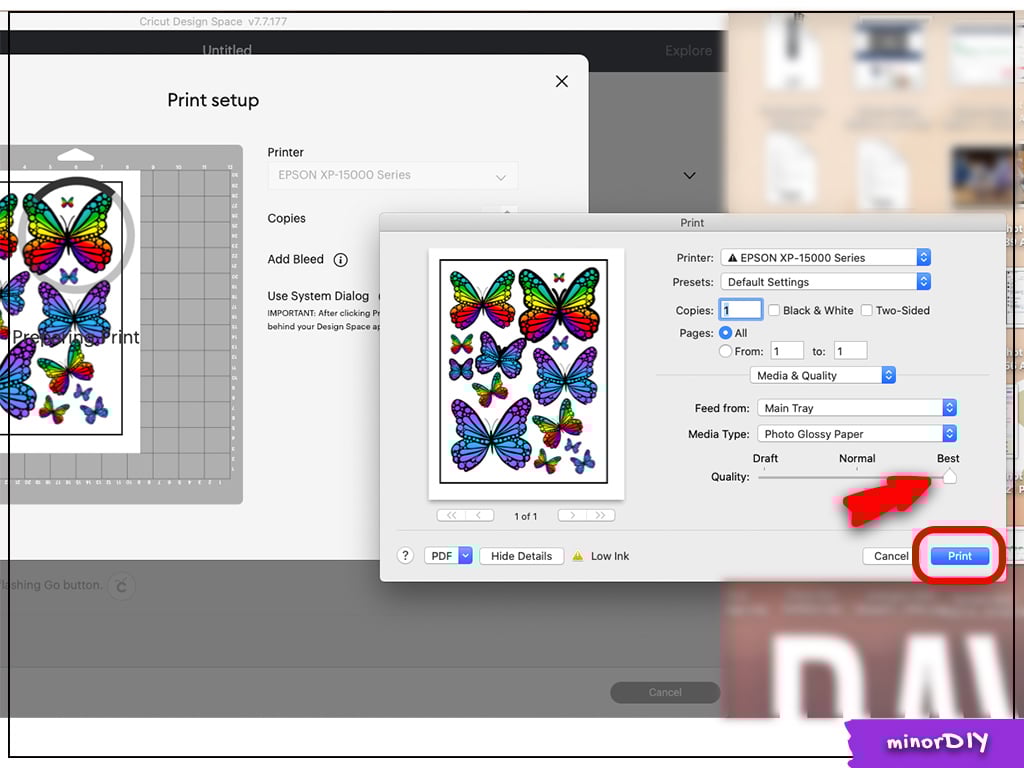
The below screen will pop up.
Always choose Add Bleed. This helps ensure you don’t have extra white space next to the cut line. Cricuts don’t always cut perfectly. (Calibrating your machine helps make the cuts much more accurate.)
- Need more info on bleed? Scroll to the bottom of the post.
I always choose “Use System Dialog.” This way, I’m in control of all of the settings. Click Print to open the System Dialog window.

It says it “may” open behind the Design Space window… but in my experience, it opens behind the window every time. The window usually pops up in the center of your desktop.

Arrange the Design Space window so that you see the Print window.
Click anywhere on the Print window and choose the options you want to use. Always use the Best Quality option.
Then, click on the blue Print button.
The sticker images and bounding box prints out.

Place the printed sheet precisely in the top right corner of the Blue LightGrip mat. Use a brayer to adhere the paper to the mat well.

Choose the material setting that works for the type of paper you’re using.
- Previously, I created a Custom Material Setting for the Zicoto Vinyl Sticker paper, with the Cut Pressure as 157.
Want to create your own custom material setting for Zicoto Sticker Paper? Watch the tutorial video here.
On sticker paper, the type of cut needed is called a “kiss cut.” The Cricut will cut through the sticker paper, but not through the backing paper.

Load the mat as usual.
When you press the “Go” button, the Cricut shines a light over the edges of the black box several times in several areas. Those guidelines are used to cut out the image.

Unload the mat.

Peel off the excess sticker paper, and now you have a sheet of stickers!

— Making Stickers using Offset, Bleed, and Backgrounds —
Some stickers will already have a white border around them. For example, the stickers on the right side are designed so that they will always have a white border.
The stickers on the left will not have a border around them. The Cricut will cut along the edge of the image, just like it’s shown on the screen.
If you upload a PNG file to Design Space, the image should look like the butterflies on the left.
If you upload a JPG, often you can remove the background with the built-in background remover tool (currently available to Access members only.)

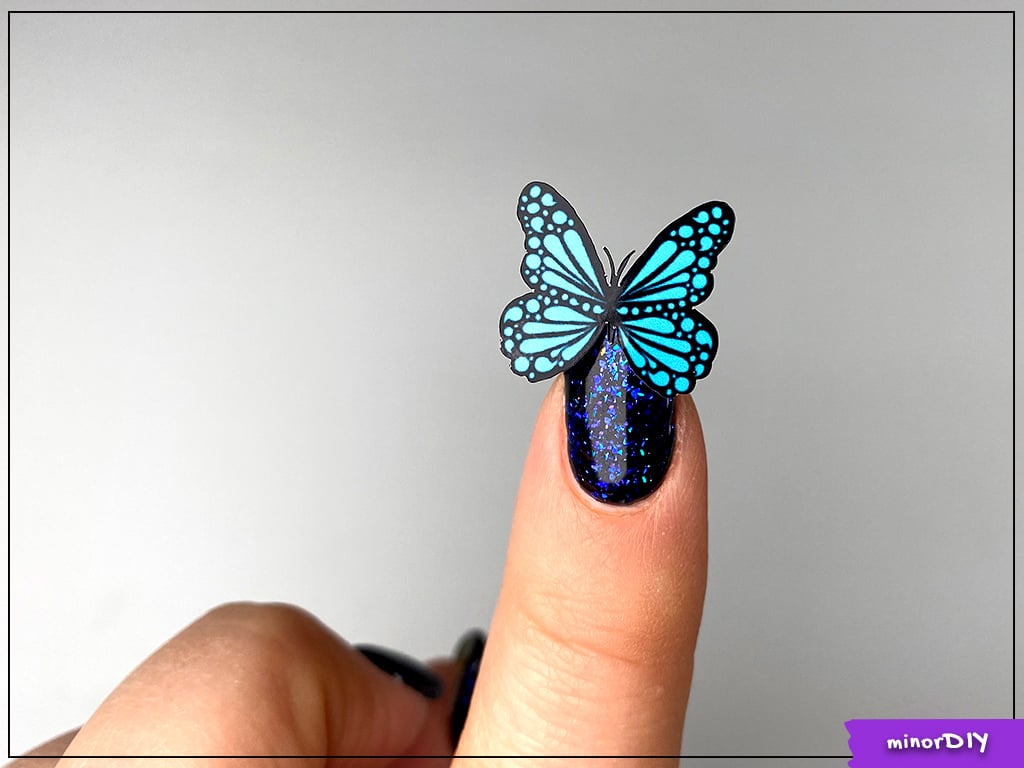
The below sticker is just a half-inch wide, and the antenna still cut out well!
How to add a border around an image using the offset tool
Click on the Offset icon (currently only available on a computer.)
Choose the size of your offset and click Apply.

A new layer is created, as shown by the red box below.
To change the color of the offset, first select the new layer.
Then, click on the color icon next to the Operation menu. Choose one of the preset colors, or create your own color by clicking Advanced at the bottom of the menu.

Select both layers and click on the Flatten button. Now, your sticker will be cut with an outline around it.


How to add a background to the image
This butterfly is very small; just a half-inch wide.

To add a background, click on the Shapes icon and choose the shape you’d like.

Arrange the layers so the shape is under the image, as shown on the right.
Select both layers, and choose Center from the Align menu.

Change the shape to any shade that you like.

If you’re happy with it, Flatten both layers.

Your sticker is ready to be cut and applied.

How to make a patterned background for stickers
You can also fill the background with a pattern. Design Space has many patterns available for free.
To fill a shape with a pattern, click on the color icon next to the Operation menu.
Choose Pattern from the Print Type menu.
Click on any print to test it out.

Just scroll through the many patterns, and click to see how it looks, until you find one that you like.

Select both the image and pattern layers, and click the Flatten icon to finish the sticker.
What exactly does “Add Bleed” do?
It adds an extra border that matches the edge of your image, so that when the image is cut out, there is no white space around it, even if the calibration is off a little bit.
See how the antennas are really thick? This is due to the bleed.

The stickers look great when they are taken off the sheet. You can see the outlines below.

Do you want to make the Semicolon Butterfly stickers shown? Click on the link for ways to use the design.
I hope you learned a lot about creating stickers, and how to use Cricut’s Print and Cut feature in Design Space, with this tutorial.
Don’t want to forget this?
Save it for later by pinning it on Pinterest.
Click the image below to Pin it.

Looking for more Print Then Cut and/or Sticker tutorials? Try these.
💜 How to use Print Then Cut in Design Space
💜 Create A Custom Material Setting On Your Cricut For Zicoto Sticker Paper
💜 How to use your Canva designs in Design Space
💜 Sticker and Print then Cut Live Q&A Call Replay
💜 How to maximize print then cut area in Cricut Design Space
Still have a question? Drop it in the comments below and I’ll answer it.
Jo says
Sometimes when I am making stickers, the machine cuts out all the details and sometimes it only cuts around the edge (which is typically the look I am going for. What step am I missing?
Emily says
You’re missing the “Flatten” step.
However, if the image you’re using has space in it, then you may also need to add a white shape behind it (like a circle) and then Flatten it all.
Alternatively, you could add a white offset if the shape is quite irregular.
Judy Clarke says
That was very easy and clear to understand! Thank you Emily, this was my first time learning about print then cut ! Awesome! I will have to go out and buy some sticker paper now!
Emily says
For a long time, I wondered why I’d use Print Then Cut. But once I started…. I use it SO much! Today, I made stickers for our family calendar with images & times for things that happen weekly (such as sports lessons.)
I also let my daughter design her own name stickers for labeling her belongings at school. How cool is it that she can make her own stickers from her drawings??
Have fun with it!