published 27 April 2019
updated 6 February 2022
updated 6 May 2023
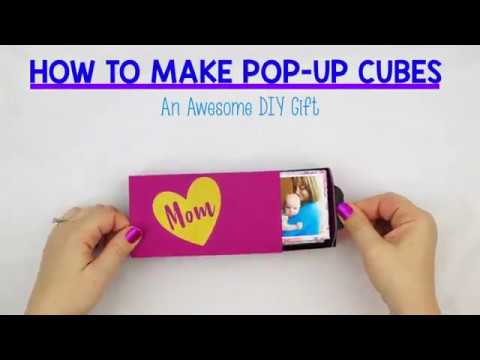
This amazing gift is the perfect DIY any time you want a fun gift. The recipient will gasp in surprise when they slide open the gift box and the pop-up cubes jump out!
I originally made these for a mother’s day gift.

I love making gifts using photos. I often gave friends photo books as
“see you later” presents (moving away is a big part of expat life.)
Currently, I’m obsessed with photo gifts that move. They can fall down, slide out, or in this case, literally jump out. The person receiving the gift gets the surprise of motion and the emotion of memories from the photos.
Just watch the clip below and tell me that you know someone who would not love to get one of these. 😍
If you don’t have a machine such as a Cricut Maker or ExploreAir to do the work, I’ve also created a PDF file that you can download, print onto cardstock and cut with scissors. ✂️
For bigger kids, this is a great craft for them to get creative with. I’ve included easy step-by-step directions on the PDF.
You do need to watch the video – it shows how to fold everything, how to use the rubber band, and how to glue everything together.
To make these DIY pop-up cubes and box, you’ll need:
- Either the SVG pattern (design #02 – Best Pop Up Cubes with Gift Box SVG) or the PDF file (design # 03 – Print and Cut Pop Up Cubes Template PDF) from the Free Files Folder
- Nine pieces of 8.5 x 11 inch, 65 lb. card stock if you are using the SVG
or nine pieces of A4 or letter-sized card stock if you are hand cutting - A way to cut and score the cardstock – I use a Cricut
- Six rubber bands (read the tutorial for tips on finding just the right size)
- Glue; my two favorites are Bearly Art Precision Crafting Glue and Beacon’s 3-in-1 Advanced Crafting Glue
- Photos or more paper to decorate the sides of the cubes
* Links to products are for your convenience in finding tools and materials, however, they are affiliate links.
As an Amazon Associate, I earn from qualifying purchases. *
What type of paper works best for the cubes?
Is it 110 lb cardstock or 65 lb cardstock?
You’d think perhaps the heavier card would be more sturdy. However, in my test, the cube in 65 lb cardstock really snapped up! You can see how high it went in my Instagram post shown below.
How to use the SVG file in Cricut Design Space
Download file design #02 – Pop Up Cubes with Gift Box SVG from the Free Files Folder.
Upload the SVG Pop-Up Cube to Design Space. (Here’s a quick tutorial if you need help with that.)
Add it to the canvas; then Ungroup it.
To adjust the drawer in Design Space
For the drawer and tab – change the layers to Score as shown below.

Select each group and click Attach as shown below.

For the drawer wrapper – Do the same thing. Change one layer to Score and Attach to the cut piece below.
Your project should look like this now.

Cut the drawer and wrapper out of 110 lb. cardstock if possible. (The light blue pieces in the SVG.)
The decorative pieces (the dark blue) can be cut from whatever you like.
To assemble the drawer
Glue the back tabs to the outside of the drawer.

Glue the front tabs to the inside of the drawer.

Fold the tab so that the middle forms a peak and the tabs are flat against the tab. Apply glue to the tabs.

Slide the tab through the drawer to create the handle.

Glue on the decorative pieces.

Glue on the bottom of the drawer.

For the wrapper, fold it so that the smaller side is on the bottom. It’s quite hard to tell which side is actually smaller, but the box will be slightly more square.
Glue the longer side on top of the smaller one.

To make the Pop-Up Cubes
Change the layer to Score as shown below.

Select the group and click Attach.

Duplicate the cube so that you have six total.

The purple triangles and squares are the decoration. Get creative with them however you like.
Each cube will just fit on a letter-sized piece of paper.

Cut the cubes out of 65-lb cardstock.
Use the Cardstock for Intricate Cuts material setting.
Tip: Cut out three cubes on one 12×24 mat to make it go quicker. (You’ll have to trim down the paper to do this.)

Be careful when you remove the cubes! The corners can easily stick and tear.
Flip over the mat. Use your scraper to hold the paper flat on the table while you roll the mat back slowly with the other hand.

Decorate the cubes.

Watch how to assemble the pop-up cubes on instagram
How to put together the pop-up cubes
This is the trickiest part! I’ve made a short video for you showing you exactly how to do it.
One question that I get a lot is “How do I know what rubber band to use?“
A quick way to judge the correct size is to hold it against the cube. The rubber band should be just a bit smaller than the cube.

Choose the slightly thicker one if you have the option. (Both will work, but the thicker one will have a bit more snap.)

Fold all of the cubes into the box and you’re finished!
Tip: Don’t keep the cubes in the box. They won’t pop out as dramatically. Store them outside of the box and then fold them in just before you use it.
Questions? Leave them in the comment section below!
Decorating the pop-up cubes:
It’s easiest to decorate the cubes after you’ve burnished along the score lines, but before you glue the cube together.
Draw, glue patterned cardstock, or glue photos onto the four sides of each cube.
You could also use stickers, washi tape, or cut more paper accents to decorate the cubes.

Glue the triangles onto the tops of the cubes for extra detail if you like.


Your gift is ready to delight and surprise!
I hope you enjoyed making this cool gift from the free pop-up cubes template I created! I know your friend (or best friend or mom or dad or boyfriend or husband or girlfriend or wife) will love it when the cubes leap out of the box! 🥰
Ready to download the free SVG or printable? Head over to the 📂 Free Files Folder and enter the ✨ magic word. ✨ (If you don’t have the magic word, just fill in the form below first.)
Save this for later by pinning on Pinterest!

Looking for more DIY projects for your cutting machine? Try these!


Anonymous says
“design #02 – Best Pop Up Cubes with Gift Box SVG” Does not seem to exist in your file listing anymore. I don’t want the print & cut, I want the SVG. Has the name changed?
Anonymous says
card i mean
kimberly Brumfied says
hello, I’ve watched quite a few of other videos for this technique. Yours is much more understandable by far! I don’t have a cricut and I can’t find your free printable version to download and print out the pop up boxes or the box. my daughters 40th birthday is next week on the 15th. I’ve been searching for 2 weeks and keep coming back to your site, cute unicorn box by the way. is there anyway at all you can help? please??
Emily says
Hi Kimberly! I can help.
First, you need to login to the Free Files Folder. There is a link in the menu at the top of every page.
Then, scroll ALL the way down to the bottom of the page. It may take a little while to load. They are designs #03 and #04. Click the name of the file to download it.
Here’s a link to step-by-step instructions. https://minordiy.com/how-to-download-files-from-the-free-files-folder/
Anonymous says
Oh, my word!! That was too easy I was doing it all wrong! I’ve printed them all now, and with your video I’m going to start assembling them. I appreciate the help so much. I love your channel! Would you consider doing any more printables?? your quick response was appreciated as well that shows to me you appreciate your subscribers.
Amanda says
When I go to have it on the cricut- it was showing 3 different “sheets” that it was going to cut on. I couldn’t figure out how to do it. I Do you have a video of the cricut process?
Emily says
I don’t have a video yet. I did just update the tutorial – have a look and see if that helps.
Luciane says
Thank you for the tutorial and the video. I’m cutting out the 6 jumping cubes but I don’t understand how to fold the handle of the box. Can you help me please? It is for a birthday !
Emily says
See (in the step 3 image) the part that looks like two ovals? There are 4 score lines there. It’s easiest to make the rest of the drawer first. Then, fold one oval down so it’s at a 90 degree angle from the drawer. Fold the second oval under it. Half of it is glued under to create the tab, and the second half is glued to the outside of the drawer, creating a tiny shelf for the tab.
I hope this helps! I’ll put this post on my list to update; I realize I don’t have clear photos of each step.
Heather Mercer-Rodriguez says
Made this for my mom’s birthday, can’t wait to see her face!
MonaLisa says
This is super awesome! Thank you!!
Emily says
You’re welcome! Share a photo of your version.
Cyndi Asher says
I made 6 of these with 6 cubes each for Christmas gift cards, After the cubes popped up the gift card was in the bottom. They were sooooo much fun to make. There was a minor issue though. If the recipient held the box in the middle on the sides to pull the drawer out the cubes got stuck and didn’t pop out. After they realized and held it at the back they popped out like they were supposed to, still fun!!!
Udaya says
What type of sheets are used to do this
Emily says
You can just use regular cardstock or scrapbook paper.
Jessika says
Thank you so much for this!!! I was searching everywhere for a file like this.
Emily says
I’m so glad you found it!
Kim says
I just tried it and I got the concept but the svg comes out really small on my iPad and I tried to resize it the cube came out fine but then the box was too small
What are the dimensions on the svg???
Thank you
Kim
Emily says
Hi Kim! Good question! The red wrapper on the box should be 11 inches wide (and of course the other pieces in the SVG are resized along with it.)
I’m not sure why this one SVG has issues on iPad. I just added the information about the box to the downloads folder too, so anyone downloading it should see the message.
shaynee says
silly question – but cant fimd a good sized rubber band… some are too loose – some too tight…any suggestions???
Emily says
It’s not a silly question at all! In the updated post with the pop-up cubes, I go into the research I did on the rubber band size that works for me.
Of the sizes I had from an assorted pack of rubber bands, the largest worked best. If I squish the band down into a line, it is 3 inches (80 mm) long. From my research, it seems that this is size #18, which is 80 mm long and 2 mm wide.
shaynee says
yay – thanks…. i ordered them from your affiliate link and they will come tomorrow
i appreciate it!!!!!!
Emily says
Great! Please let me know how well they work!
Anonymous says
love love this – thanks for sharing… i did one, but the rubber band seems too loose… what size rubber band did you use?? i have a bag of assorted sized….. i can just do trial and error but wondering if there is one that works best… thanks for sharing!!!
Avasmum says
Amazing!
I’m going to try it later today. Thank you!
Harshi says
Hi, This is lovely! Will i be able to use the Cricut Joy for this? Also, is there anyway I can get printed pictures on the cube instead of having to paste them?
Emily says
The Cricut Joy can’t be used to make these cubes right now, as they are too big, and the Joy doesn’t score. You could download use the file to hand-cut the cubes, and use an image editing program to put your photos directly on the cubes. Then you could print it out and handcut.
Anonymous says
The sizing seems off on the svg? Not sure what I’m doing wrong. Can you please provide measurements.
Emily says
For some reason, it comes in very small if you are using an iPad (as I mentioned in the post.) Originally, the length of the file is 11.5 inches.
sumit says
size of photo will be
Emily says
They are 2 inches square.
Fla says
Hello je ne trouve pas le formulaire pour avoir le code
Emily says
The code is in the email that you were just sent. It’s in the very last paragraph on the bottom. 🙂
Soraya says
Thank you for sharing this file. I making cards for some students and always look for something that will make them smile.
Helena says
What weight paper do you use for your pop up boxes? I have some thin stuff, 80lb, even 120lb. What works best?
Emily says
It sounds like your thinner stuff would be about right. Around 65 lb works quite well. The thick stuff doesn’t seem to spring out of the box as well.
Starr says
Thank you so Much! I am in the process of making them now. I only want to do one cube, do you know how I would shrink the box down to fit just one cube?
Emily says
That’s a bit tricky!
You’d need to keep most of the dimensions of the box the same and just change the height. It would be possible to do with the box by just moving the score lines.
However, with the drawer…. you’d really need to redesign the entire drawer. The center rectangle would be the same, but the edges would be much smaller.
Unless you are a graphic designer, I recommended keeping it the same, no matter how many cubes you are using. 🙂
Erin says
I was wondering what the sizing is for cricut is the svg already to size or so I need to change them once uploaded into design space?
Emily says
It is the correct size if you are using 12×12 inch paper.
If you are using A4 or letter-size cardstock, I believe that you need to make it just a little smaller.
melissa says
im excited to make this for my son, but the password does not seem to work.
Emily says
For some reason, occasionally you get an error message when you enter the password, even though it is correct.
If you go into “InCognito” or “InPrivate” mode and then enter the password, it will work.
Sorry for the hassle – I am working on a solution to this!
Kay Blanton says
These are so fun! Can’t wait to make one for my granddaughter. Do you need double sided paper for the boxes? What are the extra triangles for? I see where you used the 4 that are with the box but there are 4 more and I don’t see where you used them.
Emily says
Nope, the paper doesn’t need to be double sided because one side is always in. That’s just what I had on hand. I put the extra triangles on just in case you want to have 4 triangles on top instead of the two. It’s up to you.
Andrea says
OMG love it!!!
Emily says
Thanks! I love it too. The look when when someone opens it is so much fun. I’d love to see your version.
Amy says
This looks SO fun, can’t wait to try it! Thank you~
Emily says
Please share when you do try it!