Use your Cricut to make a layered wedding card using the couple’s photo. Download the free wedding card SVG here.
I’ve used this template for several couples, and they all loved their cards.
Couples often get lots of white generic wedding cards.
This wedding card SVG was made to be displayed!
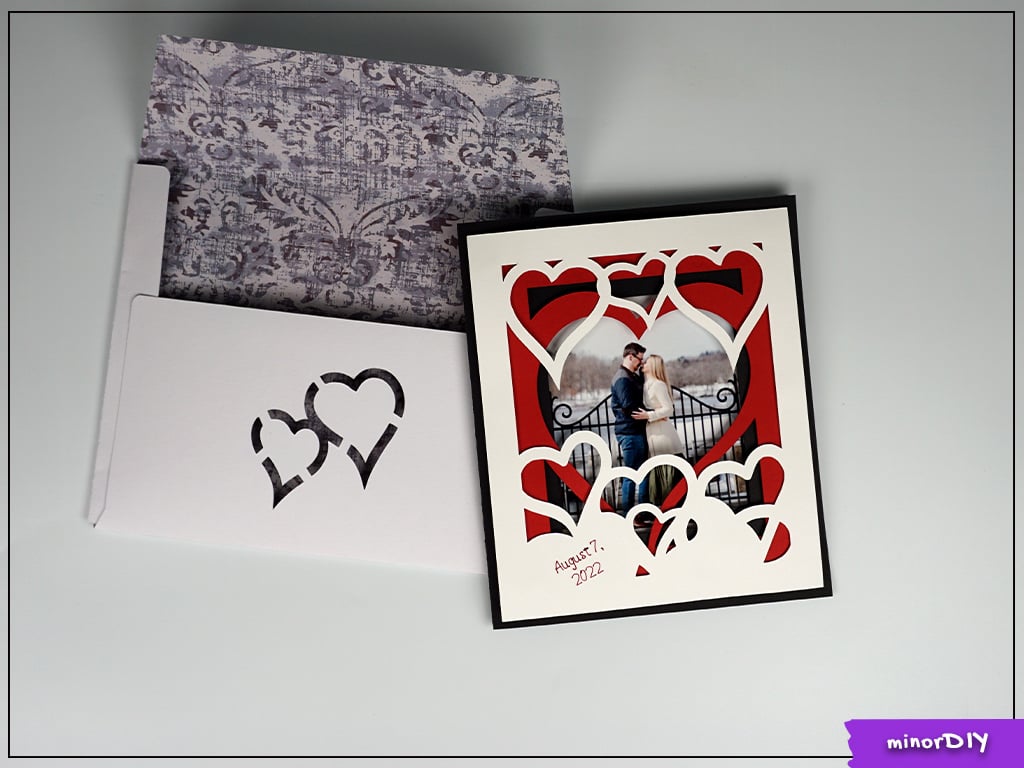
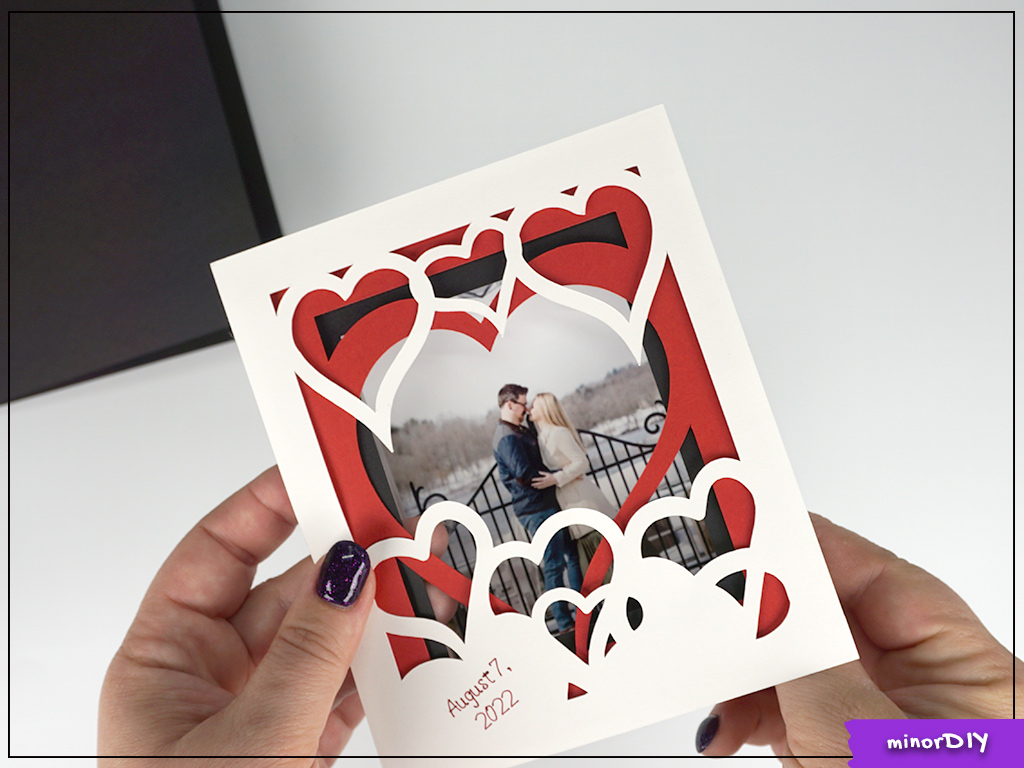
Amanda and Jeremy shared photos from their engagement photo shoot online, so I was able to use one of the photos for their card.
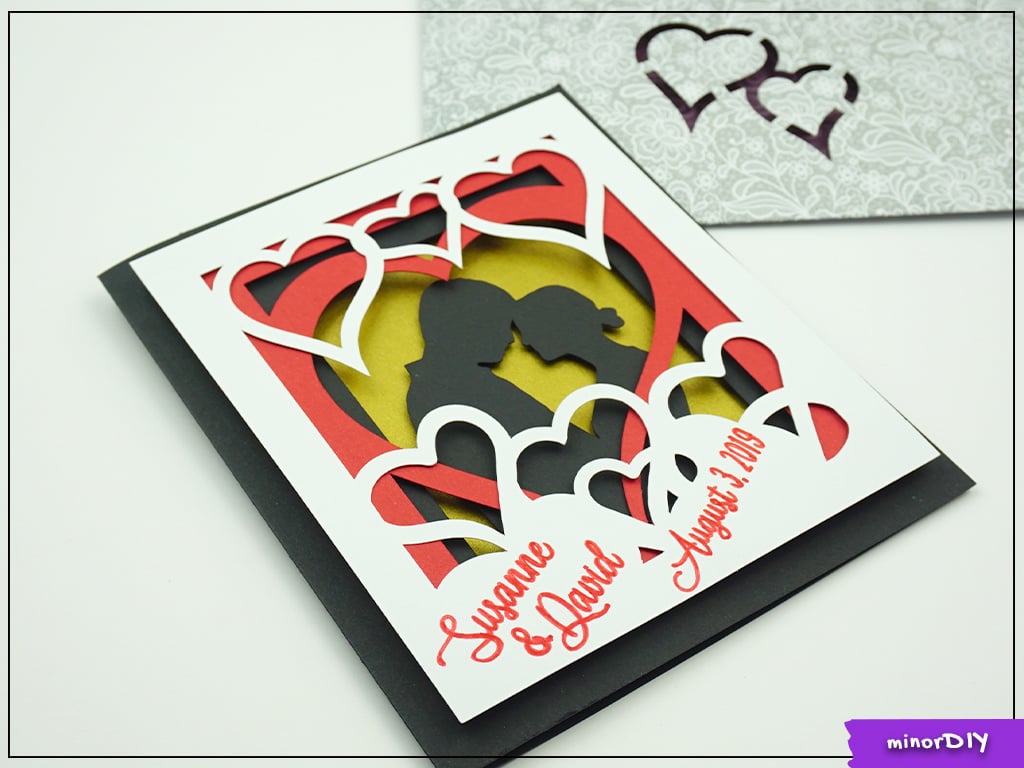
I also gave it to a couple whose wedding was in the UK. I didn’t have a photo of them, so I used a silhouette, which is included in the free SVG.
This card was originally designed for my wedding anniversary. That’s why it has a nice large space for a date…
My husband always thinks our anniversary date is the 27th, not the 29th. (Now it’s become such a running joke that I’m never sure if he really remembers the date or not.)
Materials needed to make the wedding card:
- the free SVG -it’s Design # 82 – Wedding or Anniversary Card & Envelope
- cutting machine, such as the Cricut Maker or Cricut Explore Air
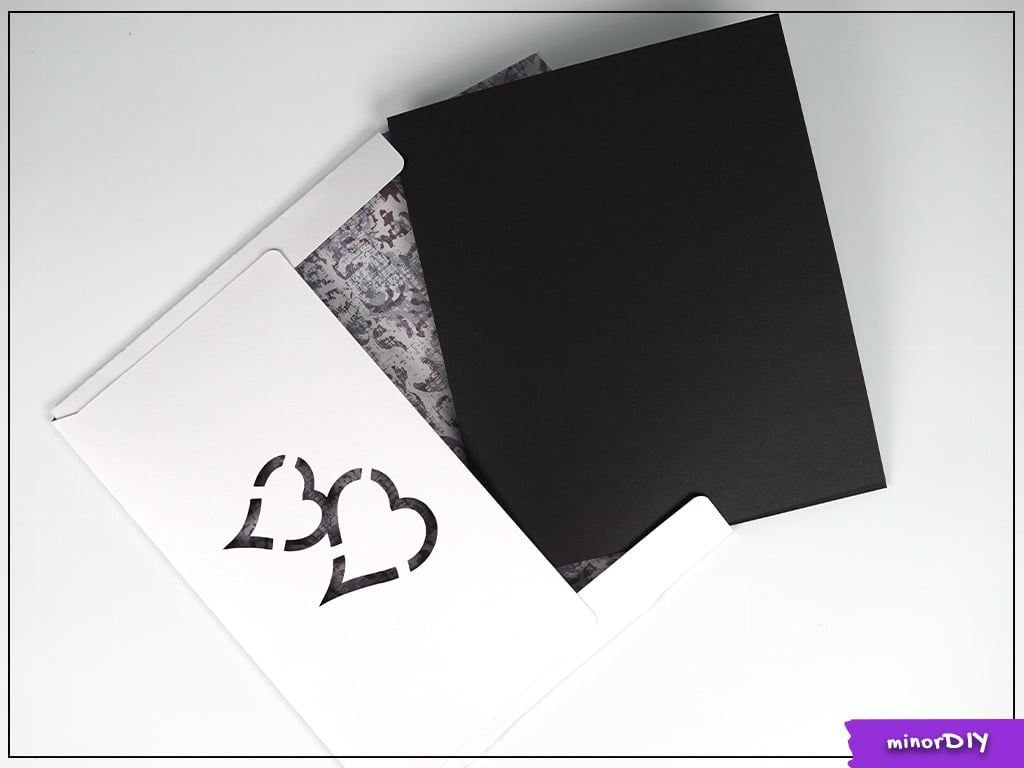
- three sheets of different colored card stock, in letter or A4 size – I used black, red, and white
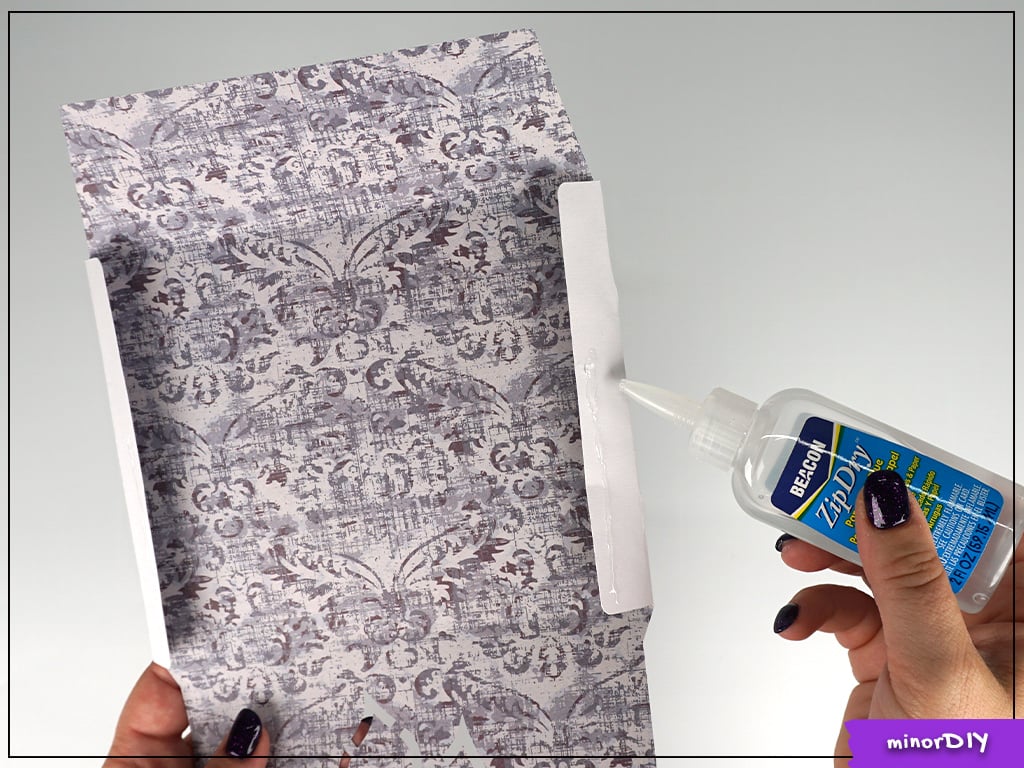
- One sheet of 12 x 12 card stock for the envelope
- Scoring tool – either the scoring stylus or scoring wheel
- Brayer – I have both the Speedball and Cricut brayers because I’m always setting them down somewhere…
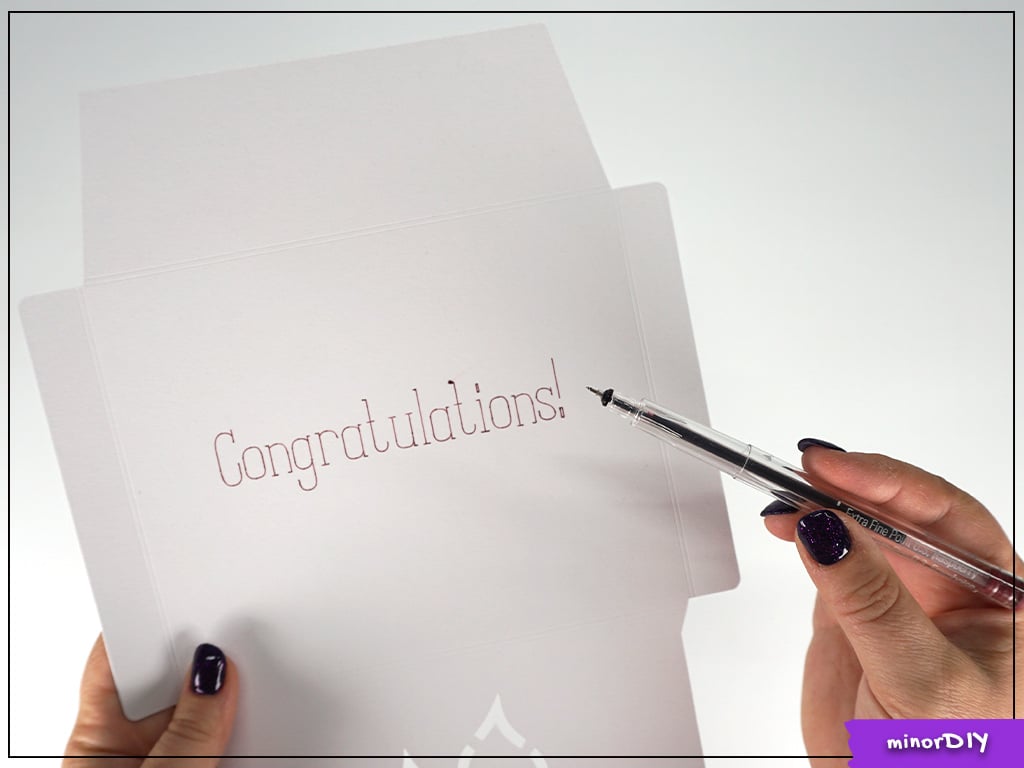
- Cricut writing pen or marker – I used the extra fine point 0.3 gel pen in Raspberry
- Glue – Beacon Zip Dry or Beacon 3-in-1 Advanced Crafting Glue are the best for wrinkle-free cardstock, but the precision tip on Bearly Art Precision Craft Glue works very well for the top layer
- (optional) spacers – I used what I had on hand, but they were too big. I’ve ordered these for the next layered project. Just glue the frame together if you don’t want the space between layers.
💜 Click here to see the
best supplies for paper crafting
on one page, with photos and links. 💜
* Links to products are for your convenience in finding tools and materials, however, they are affiliate links.
As an Amazon Associate, I earn from qualifying purchases. *
How to use the free wedding card SVG in Cricut Design Space
Download the SVG file # 82 – Wedding or Anniversary Card & Envelope from the Free Files Folder, then unzip it and upload it to your cutting machine’s software. (Read this tutorial if you need help uploading to Design Space.)
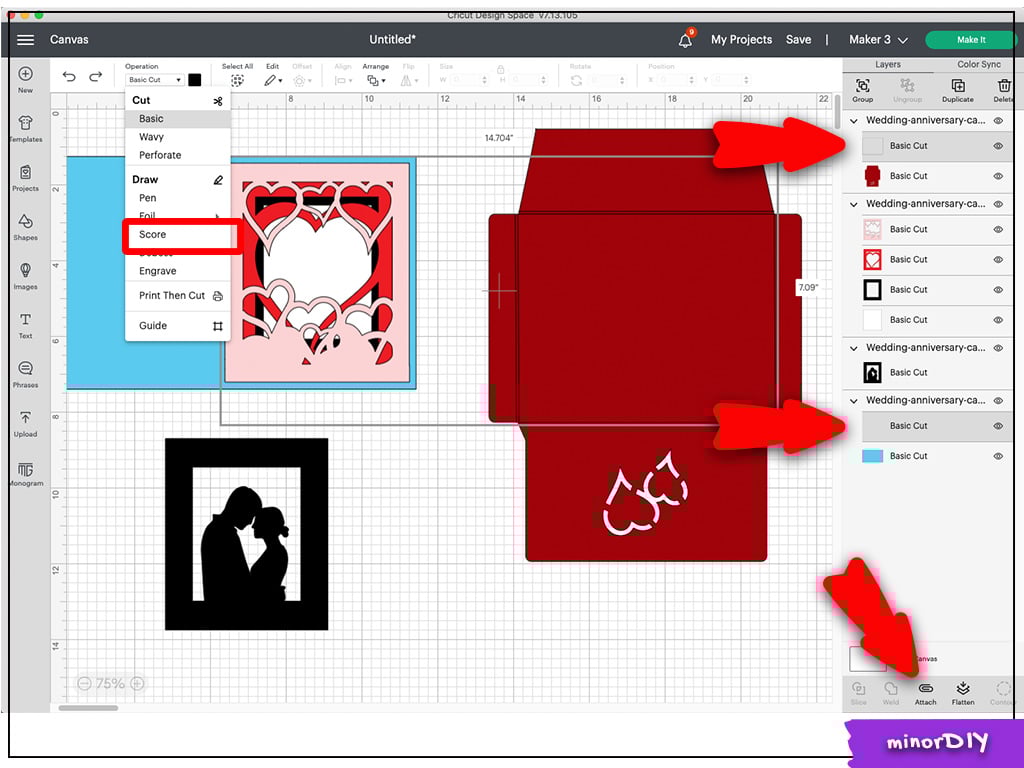
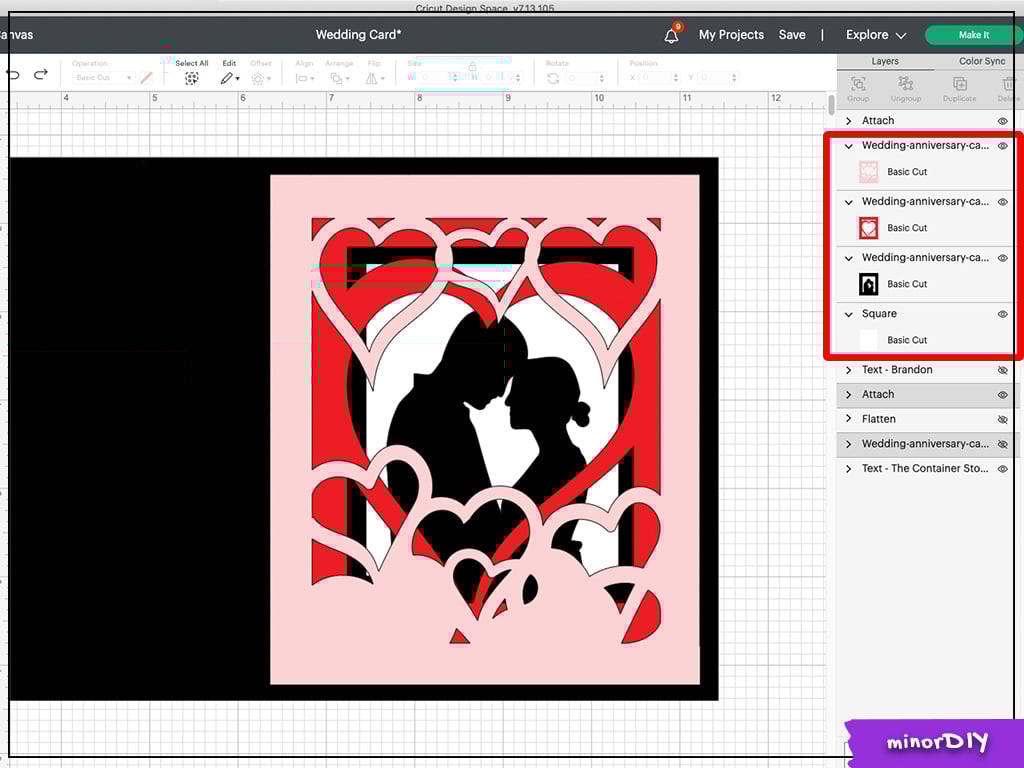
Ungroup the file.
Next, select the two cut lines (as shown below). Hold down the Shift key and click each of the lines to select them at the same time.
From the Operation menu, select Score.
Attach each score line to the cut piece below it.
If you want to use a photo in the card, upload an image to Design Space.
Resize the image, and then use the slice tool to get it to be the right size. The white box is the size needed.
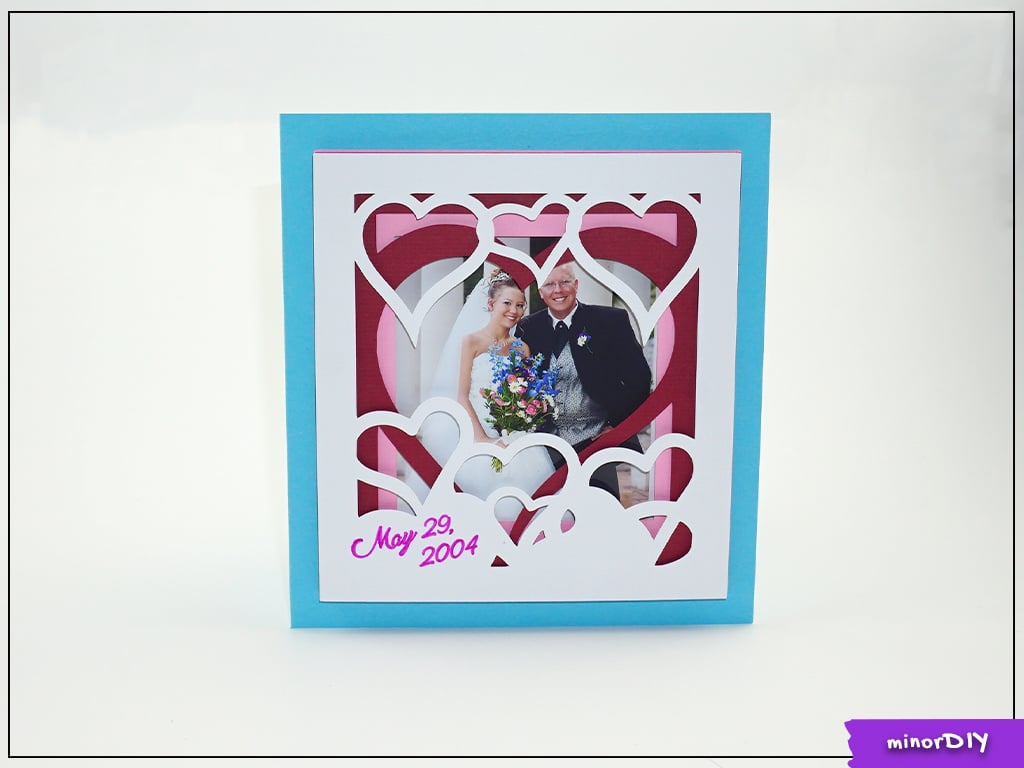
I used a photo of the couple that I took from their wedding website.

(I love using photos in my crafting so much that I created a whole workshop about it!)

The other option is to use the silhouette included in the file.
(I plan to add many more diverse couple silhouettes in the future; right now it is just a very traditional-looking couple.)
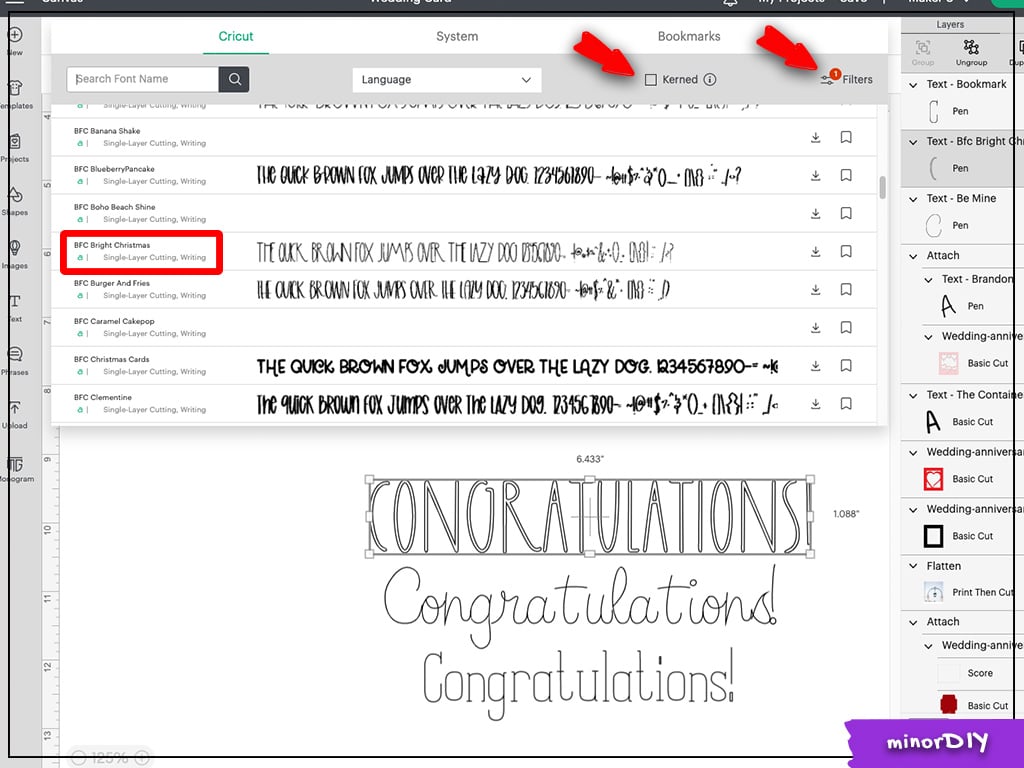
If you’d like to add the date or their names, create a text box in Design Space.
Then, choose a writing font. Filter the fonts by clicking on “Filters” as shown below.
If you don’t have Cricut Access, you’ll have a very limited number of writing fonts to choose from.
PSA:
I resisted getting Cricut Access for a very long time.
Why pay for something when I can just design it myself?
However, now I’ve decided that it’s definitely worth it. (I only have standard Access; I can’t say if the upgrade to Premium is beneficial.)
I wish someone would have explained it to me like this:
Top five reasons
why you might want to subscribe to Cricut Access:
- No designer can create writing fonts. They always write as an outline and look bubbled. This goes for any font you might upload. Access is required to get many writing fonts.
- Lots of the mystery boxes are for Access subscribers only. It’s fun to get a variety of materials and tools that I wouldn’t buy at full price. (For example: the TrueControl knife and weeding kit. I didn’t want to spend $30 on a knife…. but I was super happy with it when it came in a mystery box!)
- Hundreds of thousands of images are included. For example, I needed a pine cone image. Access had 935 options to choose from. I would have wasted so much time trying to find a free one online.
- There’s the option to pay monthly. If you just want to use it for a few things this month, use it and then cancel it. You aren’t stuck for a year. (There’s also a free trial, usually offered when you sign up. When you cancel Access, you can no longer use the images in your projects without paying for them.)
- Certain features are only available to subscribers, such as the “remove background” tool.

If you don’t choose a writing font, the text writes as an outline.
Even if it says it’s a writing font, sometimes it draws as an outline. (As shown below.)
I also discovered that almost no fonts show up in the filtered results if you have the “Kerned” box checked. (In the current version of Design Space, it’s checked by default.)
Be sure to uncheck the Kerned box to see all of the font options.
After you found a font that you’re happy with, Attach the text layer to the cut piece below it.

Do the same for any text on the envelope.
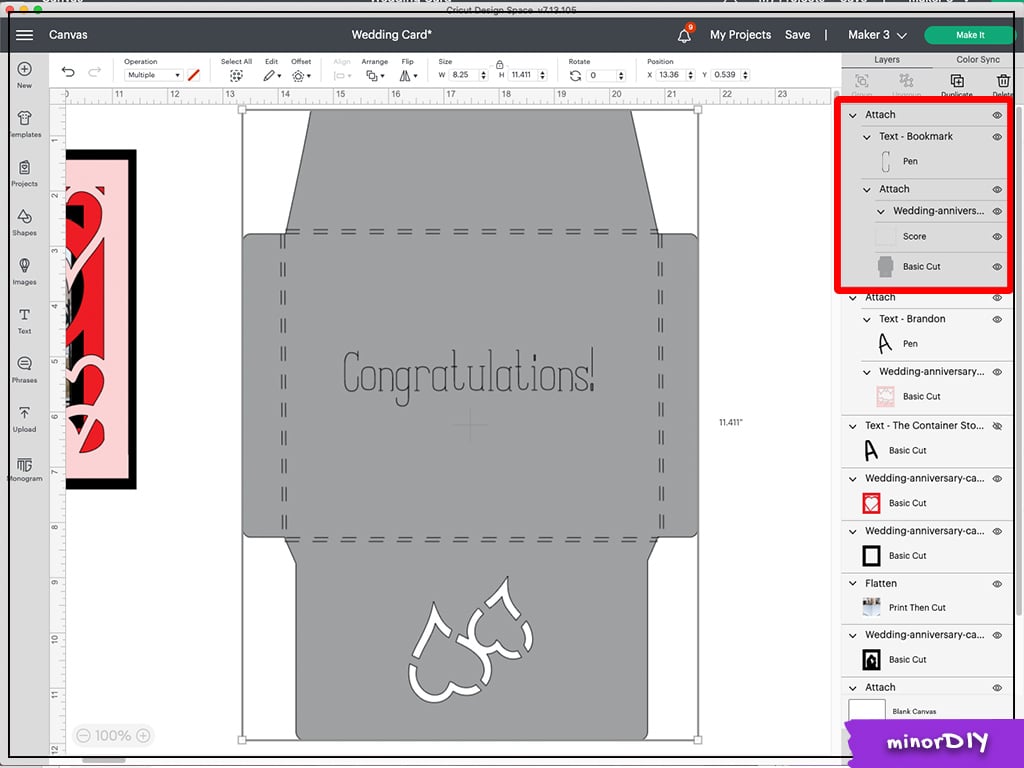
How to assemble the layered wedding or anniversary card and envelope
After everything’s cut, assemble the card, starting with the top layer.

I used adhesive dots to give the card some depth. They were too big but were what I had on hand.
I’d recommend using small foam dots instead if you want the layered look.

Flip each layer over to attach it.

Repeat for each layer.
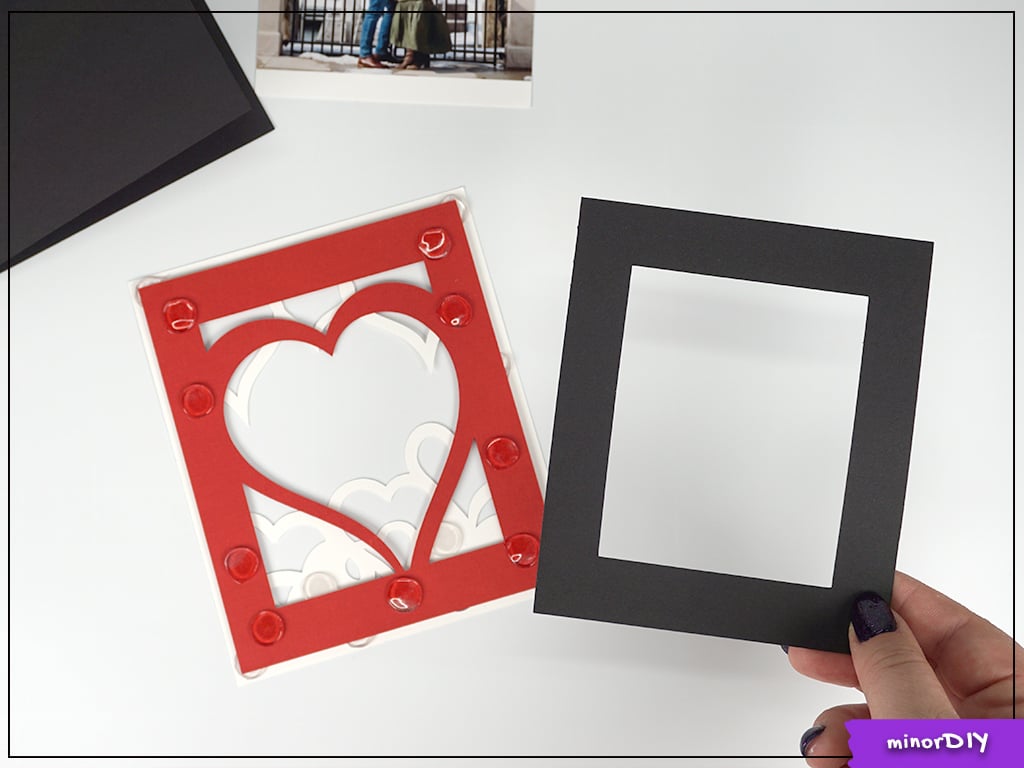
Position the photo while you’re looking at the front of the card, before you glue it into place.
I learned this the hard way…
Scroll back up to look at my anniversary card and you’ll notice that our heads are slightly behind the top layer. We’re peeking out from under the frame.
Tip for using the gel pens: Immediately before it starts writing, wipe off the glob of ink that forms at the tip. I couldn’t get the first tiny bit of writing to not have an ink blob at all, but some text had a terribly big spot before I tried wiping it off.
Burnish along the score lines.
Then, glue the bottom of the envelope to the sides.
When you put the card into the envelope, be sure to have the layered front of the card to the inside of the envelope. The solid color of the back of the card looks great through the cut-out hearts on the envelope.
It’s done! Stick some cash in there and it’s ready for the big day.

The just-married couple will love this layered wedding card using their photo. I hope you enjoyed learning to make a wedding or anniversary card with the free SVG and your Cricut.
Not quite ready to make it? Pin this project to Pinterest to save it for later.

Karen Funk says
Love this design. Our granddaughter is getting married in July and I have the layers cut already. I want to add a photo of them inside. Thank you for this lovely wedding card!
Emily says
Oh perfect!! I’m sure they will love it. I hope you have a lovely time at the wedding.
Donna says
I love this card! Thank you for sharing it. Could you do a tutorial on how to write without it coming out as an outline? What types of fonts to use, how to search for them in Cricut etc.
Emily says
I have a tutorial here.
https://minordiy.com/how-to-cut-and-write-on-cricut/
Beng says
I love it! I already cut 1 for my son and daughter-in-law’s wedding Anniversary. Just don’t know what to do with the picture – did you print and cut it? I did the upload and slice as instructed so when i click make it, it wants me to print and cut.
Emily says
Yes, that’s exactly what you do. Happy Anniversary to your son!
Rosie says
I have the Scan n cut DX (SDX225F). The files work just fine. The fold lines default to cut lines, so I need to change them to fold lines. Other than that, I don’t have any problems using your files.
This is my first machine, so I don’t know about other versions of the Scan n cut machines.
R
P.S. I made this card for my daughter to give to her friends and I LOVE it! Thank you for sharing 🙂
Emily says
Great! Cricut users also have to change a few lines to score instead of cut – the software designers don’t allow us to set the linetype. I try to do a screenshot showing which pieces need to be changed every time.
I’m so glad you like the file! It’s the first layered design that I created.
Emily says
Also, thanks so much for the Scan-n-Cut information!
Sara Kallioinen says
Guess I should have bought a cricut since everything is written for that. LOL
Sara
Emily says
It’s definitely ended up much more Cricut-focused. You’ve encouraged me to list a new category so anyone without a cutting machine can easily find the projects to hand cut or printables. Look at the menu at the top left of any page, and click on the “Printables and Hand Cut Projects” to see all of them at once.
Some of the projects, like the ghost card, would be super easy to cut by hand. Just open the SVG with a web browser and print it out.
Rosie says
I have a Brother scan n cut and I can use the files on my machine.
Emily says
Rosie – From my Google search, it looks like the ScanNCut2 machine will cut SVG files directly, so all you need to do is load them onto your machine and cut.
The original Brother ScanNCut machine does not allow you to use SVG files for cutting, but you can convert them online using a free tool.
Is that correct? I get a question about it every once in a while so would like to make sure my information is correct.