Privacy & Cookies: This site uses cookies. By continuing to use this website, you agree to their use.
To find out more, including how to control cookies, see here: Cookie Policy

minorDIY

  • 🖥 Workshops
  • 🛒 Shop
  • 📁 Free files folder
  • 💜 About
    • Frequently Asked Questions
    • Contact
    • Home
  • 💥 Explosion Boxes
  • 💌 Cards
    • 🖼 Photo Cards & Gifts
    • 💌 Supportive Cards
    • 🦄 Pop-Up Cards
  • 🎁 Holidays
    • Birthdays
    • Halloween
    • Christmas
    • Valentine’s Day
  • ✅ Tutorials
  • ✨ Projects
    • 📦 Cardboard
    • Printables & Hand Cut Projects
    • Super Easy & Kid Friendly
    • Costumes
    • Shirts
    • Ear Savers
  • 🗒 Supplies & Materials

5 Tricks to Make your Explosion Box Fall Open

12.29.2019 by Emily // 5 Comments

119 shares
  • Share
  • Tweet

Learn how to make your explosion box fall open quickly and dramatically with these easy tips and tricks!

Have you started to make an explosion box yet?

Here are some tricks to make the sides drop away, revealing the next layer quickly and dramatically.


base paper for the DIY heart explosion gift box

1) Use lighter paper for the base and burnish it VERY well.

Crease the base piece back and forth three or four times along each scoreline.

130 g/m or 36 lb. paper works very well. If the folded paper is light, the sides will fall more easily. This only applies to the base paper folds.

If you’re in the US, this Colorbök paper works perfectly.


circle accents on a diy photo explosion gift box

2) Use two layers of cardstock to make the sides heavier.

The heavier they are, the more easily and quickly they will fall.

I use heavy, double-sided cardstock for the sides and all of the pull-outs.

This is the reason for gluing two circles at the top of each side heart; the weight at the top helps pull the hearts down!


add weight like coins to the tiny envelopes in the explosion box

3) Here’s a super sneaky trick – add coins in the envelopes or pockets!

The weight will make the sides fall very quickly.


boost the explosion box by using cardboard

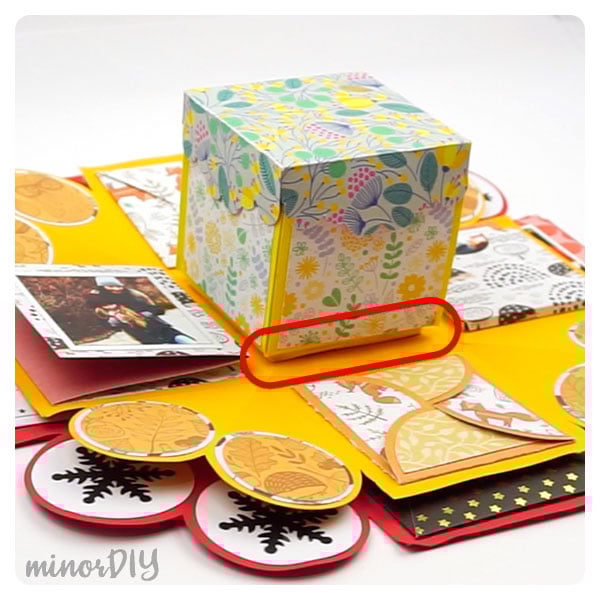
4) Glue squares of cardboard or foam board (boosters) under each box to lift it up.

If the photos, pull-outs, and pockets are thick in the previous layer, the current layer can’t lay flat.


store the exploding photo gift box flat

5) Store the box open flat. The paper will naturally try to return to its last position.

If you can’t store it flat, just open all of the layers and push them flat a few hours before you want to show off your heart explosion box to a friend.


I hope these easy little tips on how to make your explosion box sides fall quickly have been helpful!


Save this for later by pinning on Pinterest!

5 tricks to make your DIY explosion box fall dramatically - Pinterest

Categories // Explosion Boxes Tags // explosion box, tips

Comments

  1. Lucy says

    December 30, 2019 at 12:19 am

    I love these tips. Everything you mention just makes so much sense. When I watch a video of an explosion box that doesn’t “explode” I am a little disappointed. So I am very happy to read how you do it. Thank you so much.

    Reply
    • Emily says

      December 30, 2019 at 10:14 am

      LOL Lucy – I’m also a little disappointed when I see the videos and someone is pushing the sides down!

      Reply
  2. Maggie says

    December 30, 2019 at 1:20 am

    These tips are so helpful! These boxes take a lot of time and effort so ensuring they fall right is key!

    Reply
    • Emily says

      December 30, 2019 at 10:15 am

      Yes, they do Maggie! I haven’t seen any info on how to make them fall well so I decided to create my own methods.

      Reply

Trackbacks

  1. DIY Holiday Explosion Box Gift » minorDIY says:
    November 12, 2021 at 9:27 pm

    […] For the box bases, use light paper. It should feel almost like copy paper. It folds easily, and falls down easily as well, which is one of the tricks to make your box really explode. […]

    Reply

What do you think? Cancel reply

This site uses Akismet to reduce spam. Learn how your comment data is processed.

Top Posts & Pages

  • Good luck!
    Good luck!
  • Holiday Craftfest Giveaway
    Holiday Craftfest Giveaway
  • Looking for free project files to download?
    Looking for free project files to download?
  • How to make a yarn wig
    How to make a yarn wig
  • How To Make a Gift Box with Pop-Up Cubes
    How To Make a Gift Box with Pop-Up Cubes
  • DIY Christmas Pop Up Cubes Gift Box
    DIY Christmas Pop Up Cubes Gift Box
  • Minecraft Father's Day Card
    Minecraft Father's Day Card
  • Pop-up Halloween Ghost Card
    Pop-up Halloween Ghost Card
  • how to make a glowing wizard or witch staff
    how to make a glowing wizard or witch staff
  • How to make a Twist n Pop Hug Card
    How to make a Twist n Pop Hug Card

Recent Posts

  • Magical Memories Explosion Box – Holiday Cricut Craftfest
  • Sticker chat live replay and Q & A
  • How to get started with Sublimation
  • Create a Custom Material Setting on your Cricut for Zicoto Sticker Paper
  • Make your Canva designs into stickers using Cricut Print Then Cut

Copyright © 2023 · Privacy Policy · Terms and Conditions · Modern Studio Pro on Genesis Framework · WordPress · Log in

119 shares